How to start a Word document
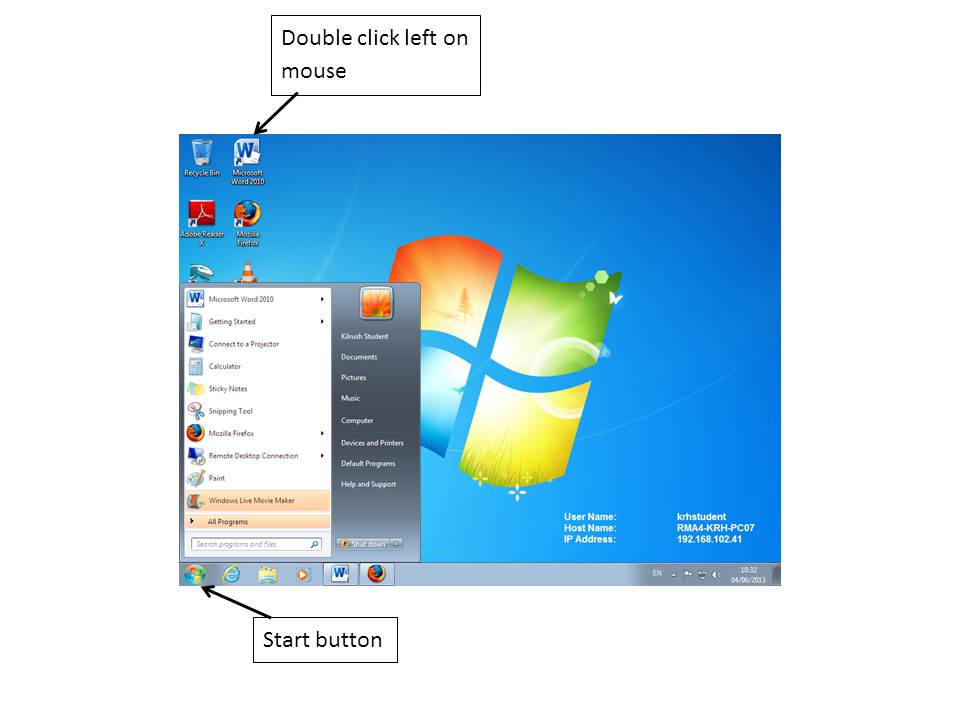
When the computer is turned on and you wish to open a word document, this can be on your desktop as seen at the top of the screen on left hand side. To open place the mouse over the symbol and double click with left mouse click. Another way to open is place your mouse over the start symbol and your window will pop up then place the mouse over the symbol and double click with left mouse click.
Choosing a font
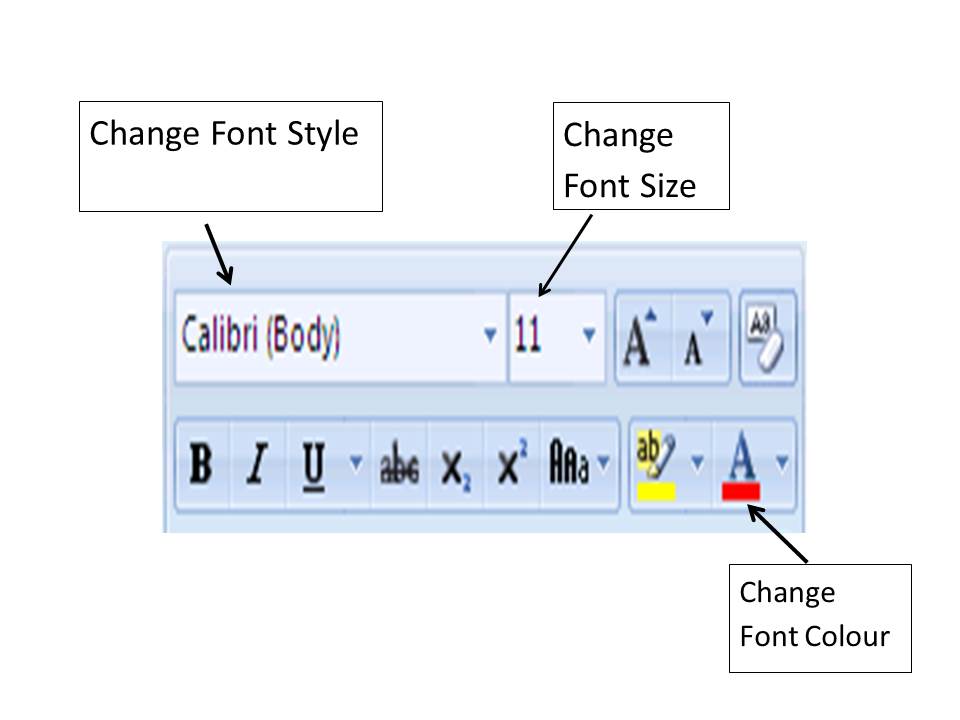
Setting your font style, colour and size is important when using Microsoft Word. There are many different styles to choose from. There are also many colours to pick and you can custom colours by selecting more colours, this allows you to mix different colours together to get the colour you want. You can change the size of the text starting from size 8 to size 72.
How to bold text in a document
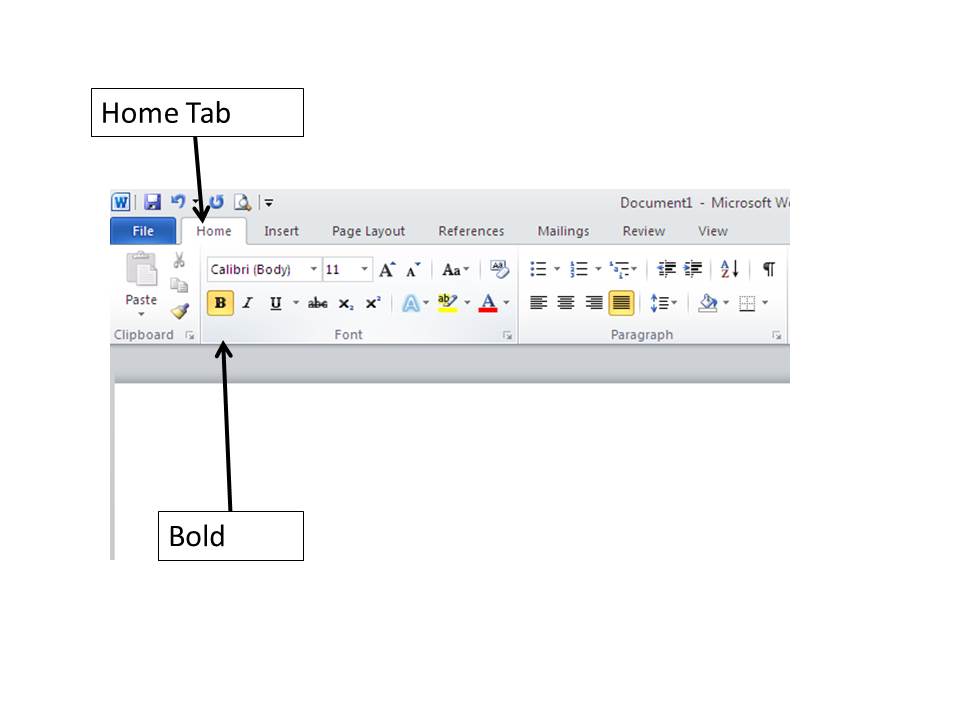
To bold text in a document, you highlight the text you wish to bold; in the home tab you click on the “B” symbol under the font dialog box, the “B” will be highlighted in yellow, this indicates your text will be bold. When finished just click the “B” again, this will turn off the bold option.
How to change line spacing in a document
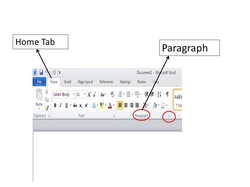
To change the line spacing in a document click on the home tab if it’s not already, click on the small arrow in the paragraph dialog box, this will open a window for indents and spacing and line and page breaks. Click on the indents and spacing tab and under the heading spacing you will see Line Spacing. Click on the arrow and choose the line spacing you want i.e. 1.5 lines or double. Click on the ok tab at the bottom of the dialog box, the dialog box will close automatically. The line spacing has now changed on the document.
How to centre, align and justify text

To centre, align or justify text in a document, you highlight the text you want to change then you click on the home tab (if it’s not already clicked) and in the paragraph dialog box you click on the appropriate option.
Create a header

To inset a header you go to the insert tab on the toolbar. And choose the header icon. After selecting the header icon it becomes highlighted in yellow.
A header allows you to enter text on the top of your document. After entering your text it becomes faded into the top of your page. The text you enter can only be edited in the header menu.
A header allows you to enter text on the top of your document. After entering your text it becomes faded into the top of your page. The text you enter can only be edited in the header menu.
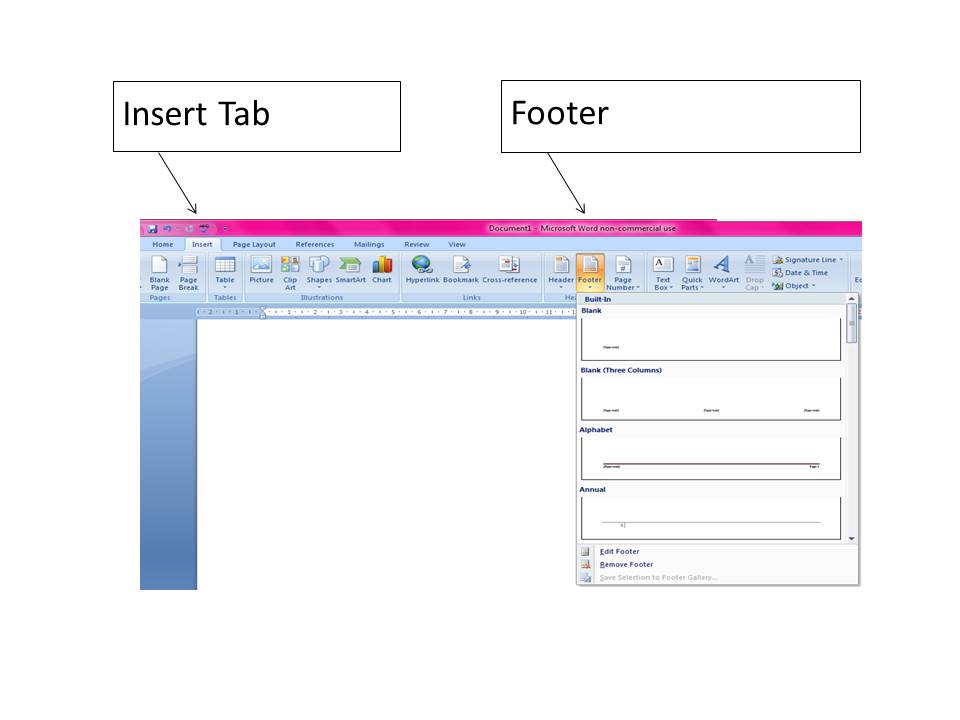
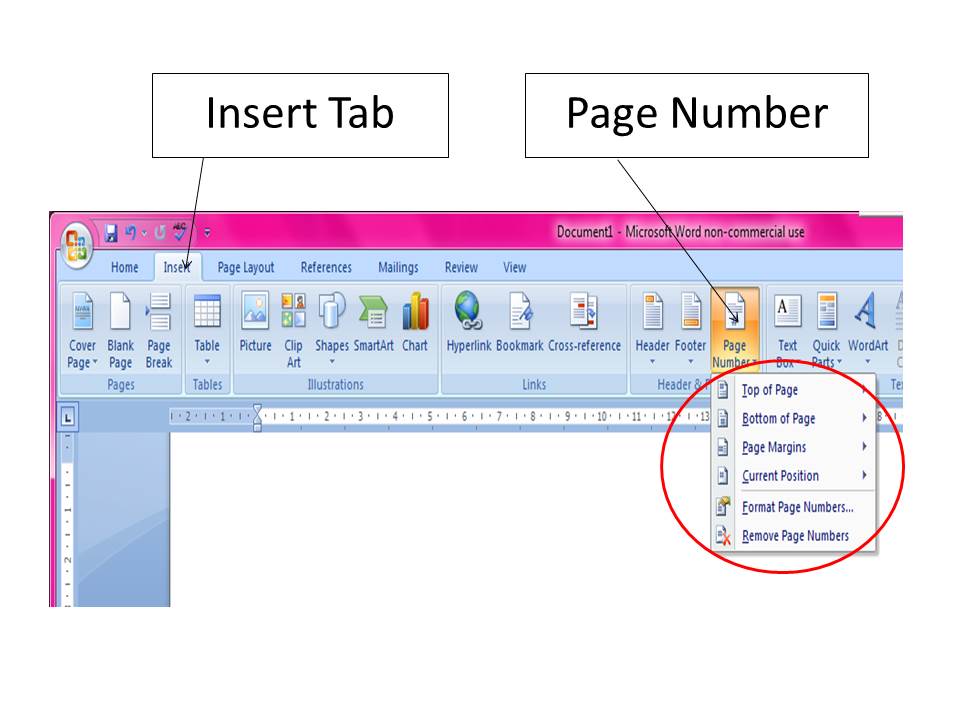
To insert a footer and page numbers
|
To insert footer, you follow the same steps as inserting a header. Footers will always go to the bottom of your document.
|
|
Spellcheck
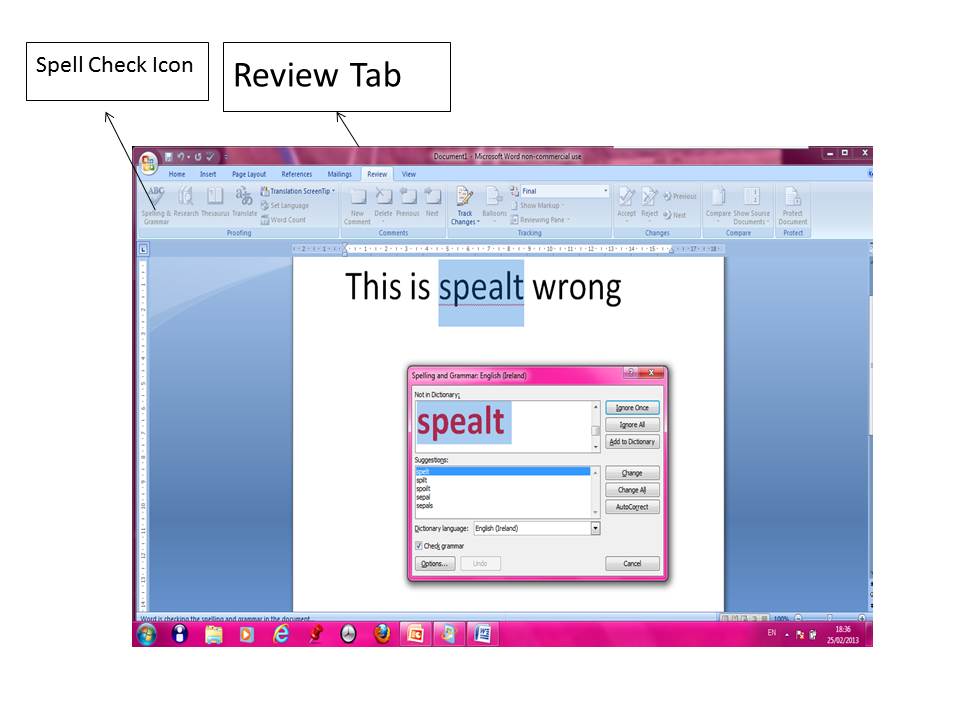
If you make a spelling mistake it becomes underlined in red. You can go to the review tab on the toolbar and click the spell check button.
It is an ABC button with a correct mark under it. Your miss spelt word will become highlighted and you will be given options of correct spelling words, similar to your wrong spelt word.
It is an ABC button with a correct mark under it. Your miss spelt word will become highlighted and you will be given options of correct spelling words, similar to your wrong spelt word.
To insert a table
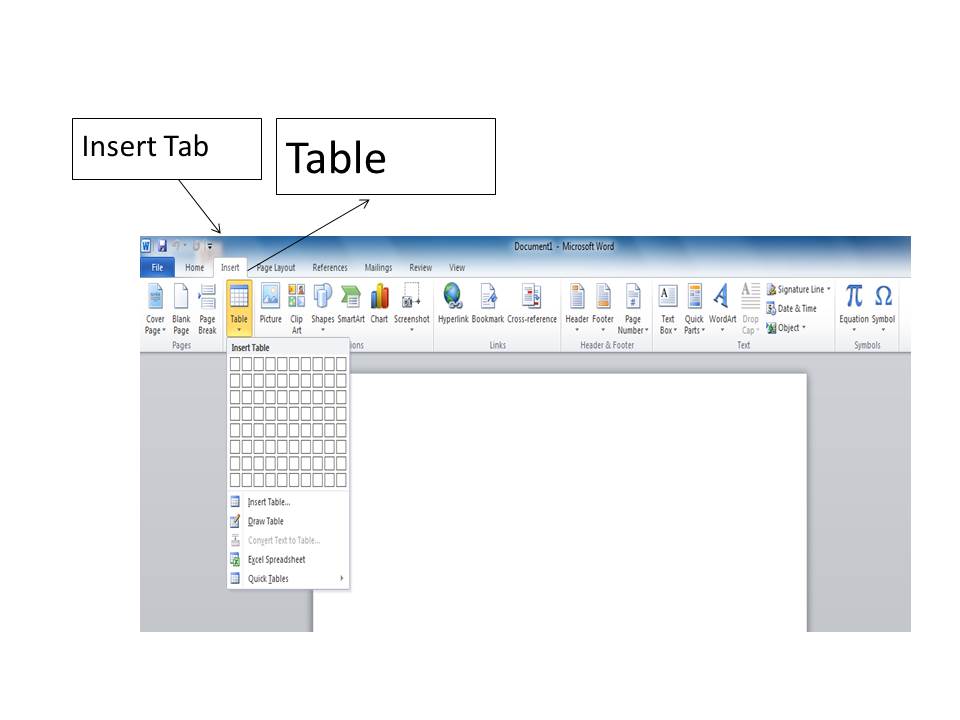
To insert a table you select the insert tab and choose the table icon. There are various ways to insert a table. Many find it easier to use the insert table option while more prefer to use the draw table option. Using the insert tab you can click the Insert tab, click Table, and then move the cursor over the grid until you highlight the right numbers of rows and columns.
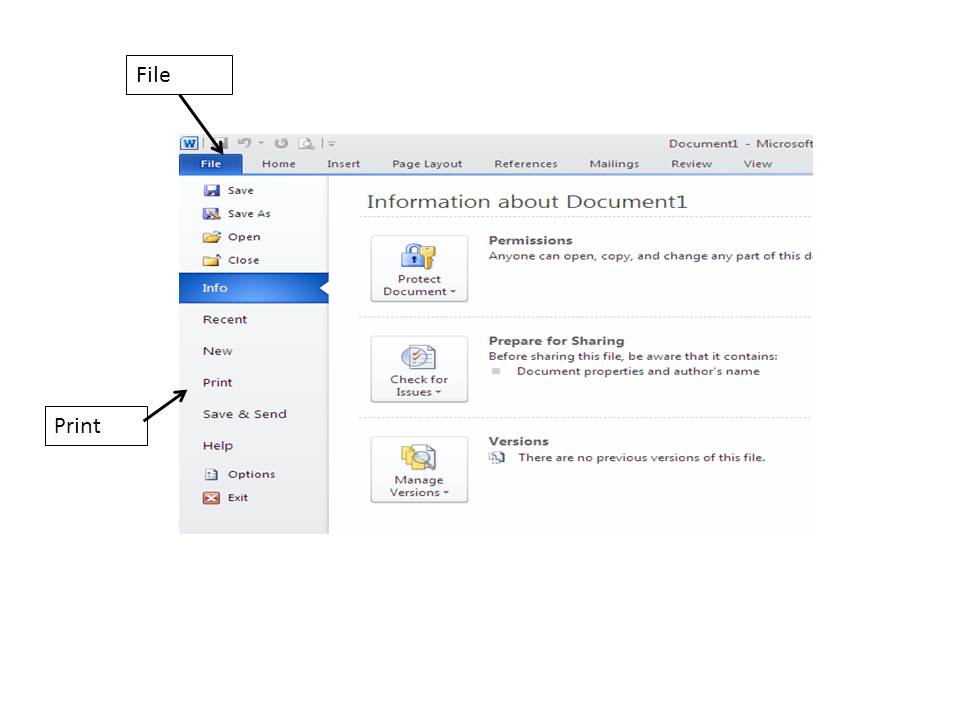
How to print a document
|
To print a document click on the File Tab at top of page. A dialog box will open giving you different options, click on the print option. This will open the print dialog box. This will give you different print options such as the printer you will be printing from; print all pages; print one sided etc. All of these options have a little arrow giving you other options, for example in the print all pages option you can choose to print all pages or print current page or a selection of pages i.e. pages 1-5. When you have chosen your desired options click Print at the top of the dialog box.
|

|
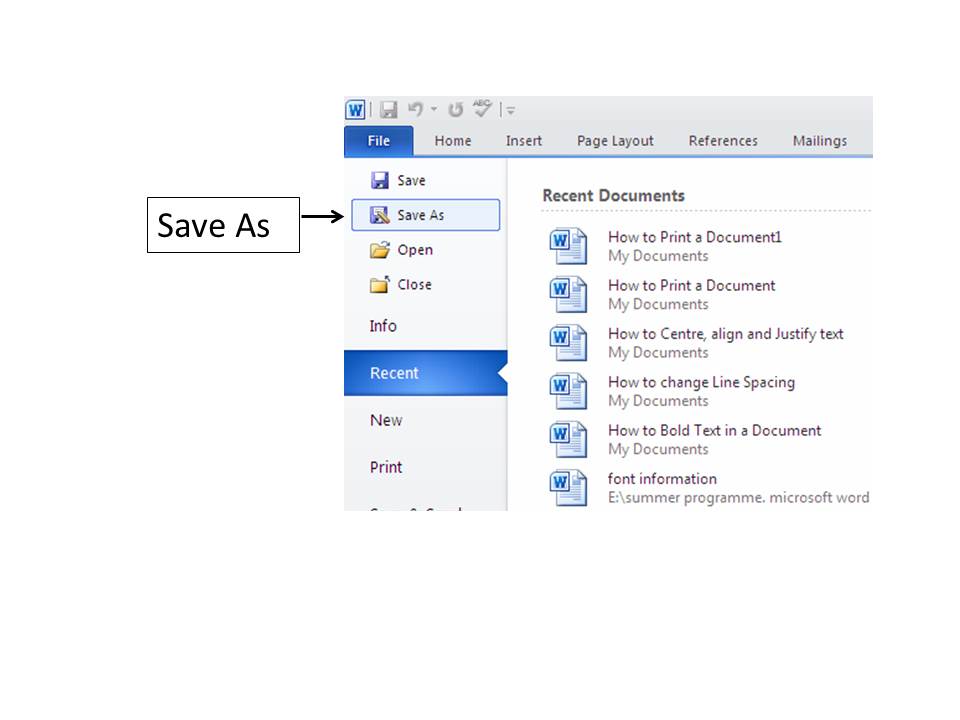
How to save a document

|
When you first save a document click File and Save As to open the Save dialog box. The default location to save documents is the Documents Library on the computer you're working on. You can alternatively choose your own folder on the server by scrolling down to Computer on the left hand side of the Save dialog box and selecting your name in the Student Home Folder. You can then access this document from any computer on the network.
Once a document has a name and has been saved you can save any subsequent changes by clicking on the floppy disk on the very top of the screen. |
|
